WordPress can be installed using Softaculous from Cpanel. It is unnecessary to install WordPress manually. However, this article will cover the steps needed to install WordPress manually.
Here are the steps for installing WordPress manual method.
Step 1 – Download WordPress
First, you need to download WordPress. Follow the bellow link to download WordPress.
https://wordpress.org/download/
Recommend PHP 7.4 or greater and MySQL version 5.7 or MariaDB version 10.4 or greater.
Step 2 – Login to Cpanel
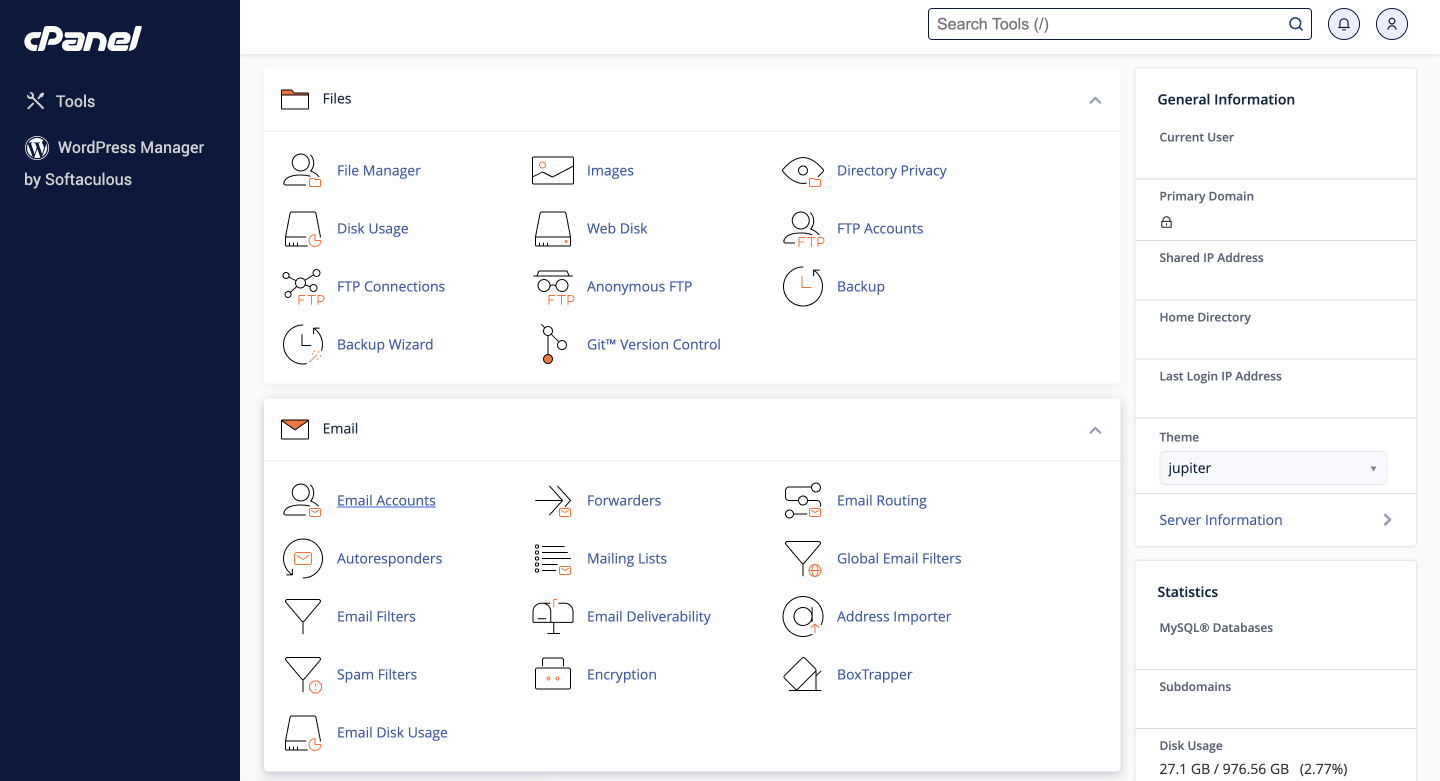
log in to the Cpanel and click on File Manager icon from the dashboard. Here I’m attaching a screenshot from the Jupiter Cpanel theme dashboard.
Step 3 – Upload WordPress to Cpanel
Upload downloaded WordPress zip to Public_html folder and extract it.
There are another 2 methods to upload this zip.
1. Upload via FTP
2. Upload via SSH
We are discussing about uploading from Cpanel file manager in this tutorial.
Step 4 – Create MySQL database and user
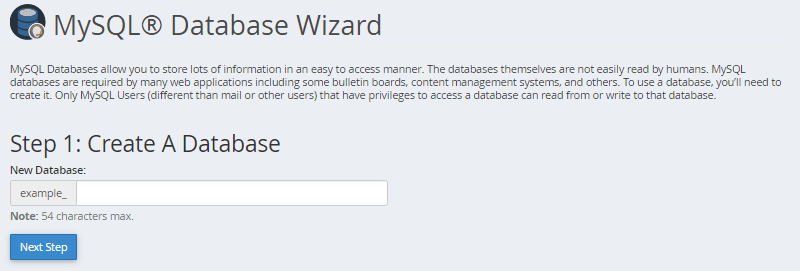
WordPress stores its information in a database. Therefore, a database will need to be created. Look for the Databases section in Cpanel dashboard, then click the MySQL Database Wizard icon.

1. Create A Database, enter the database name, and click Next Step
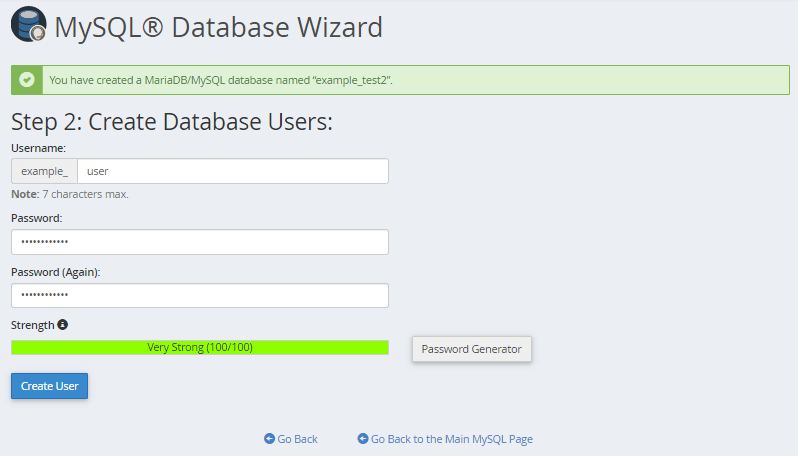
2. Create Database Users, enter the database user name and password, and click Create User.
3. Add User to the Database, click the All Privileges checkbox and click Next Step.
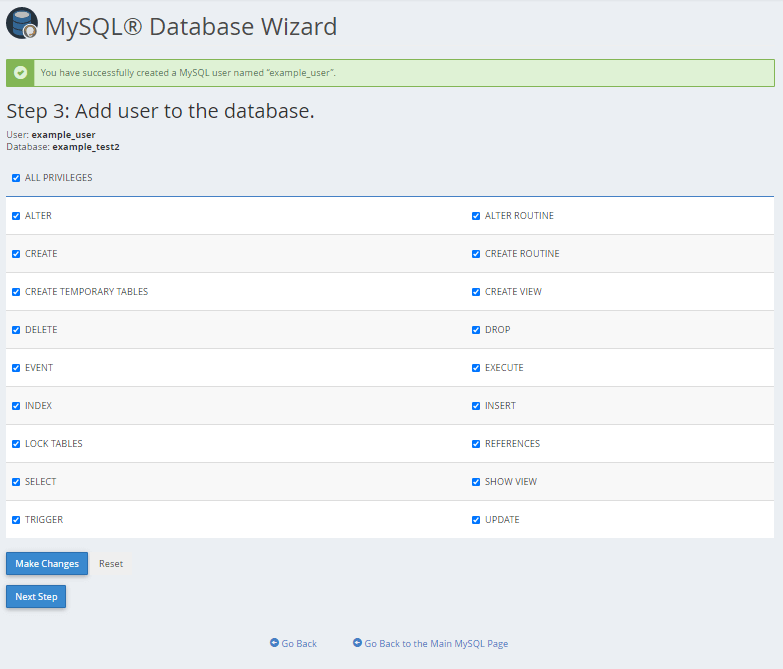
4. make a note of the database name, username, and password, as you will need them for Step 5.

Step 5 – Configure wp-config.php
The wp-config-sample.php file contains the database information and tells the WordPress application from which database to pull data. This step must be completed to ensure the correct database information is associated with the WordPress installation.
The wp-config-sample.php file can be found in File Manager in the folder where WordPress is extracted. The folder for your primary domain is public_html by default, so the steps below show the process for that folder.
Navigate to the Files section in Cpanel dashboard, then click the File Manager icon.
From the left-hand navigation menu in File Manager, click public_html.
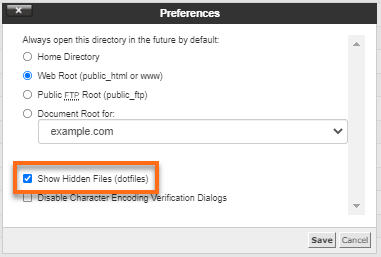
Click on the Settings button found in the top right-hand corner of your File Manager.

In the pop-up box, check the box for Show Hidden Files (dotfiles), then click Save.
In the right-hand panel of the File Manager, locate the wp-config-sample.php file.
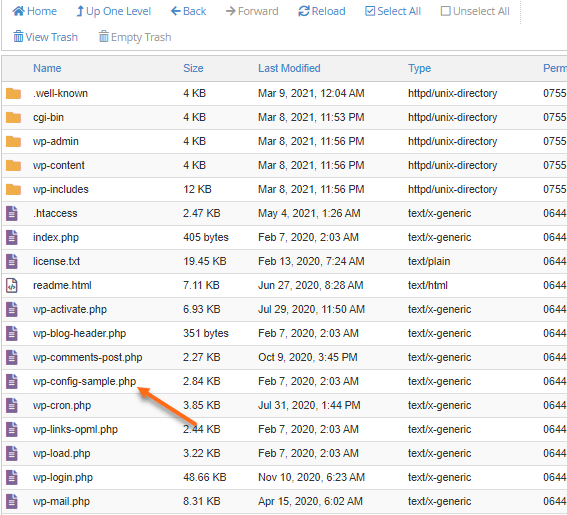
Right-click on the file, then select Rename.
Change the name of the file to wp-config.php, then click the Rename File button to save the change.
Right-click again on the new wp-config.php file and select Edit.
A second pop-up box will appear. Click the Edit button.
When the file opens, look for the following information:
/** The name of the database for WordPress */
define( ‘DB_NAME’, ‘database_name_here’ );
/** MySQL database username */
define( ‘DB_USER’, ‘username_here’ );
/** MySQL database password */
define( ‘DB_PASSWORD’, ‘password_here” );
/** MySQL hostname */
define( ‘DB_HOST’, ‘localhost’ );
Replace database_name_here with the name of the database you created.
Replace username_here with the username of the database you created.
Replace password_here with the password of the database that you created.
Once done, click the Save Changes button on the top right, then Close to exit and return to the File Manager.
Step 6 – Run the installation
Open a new browser window and enter your domain to run the installation script. Depending on where you installed the script, you will be automatically redirected to either of the following URLs:
https://yourdomain.com/wp-admin/install.php
Step 7 – Complete the installation
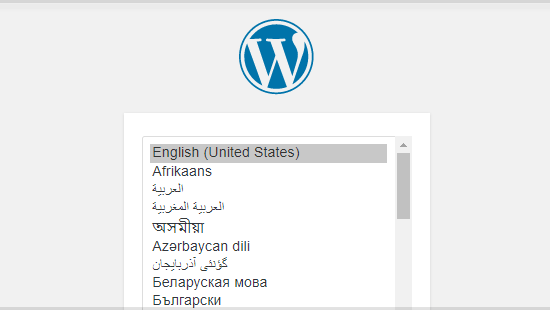
Once you access your correct WordPress URL in a browser, you will see a WordPress setup page prompting you to select your preferred language. Select your preferred language and click the Continue button.
You should now see a welcome page that says, “Welcome to the famous five-minute WordPress installation process!” Under the Information needed section, you’ll need to fill out the following fields:
Site Title – This can be changed at a later time.
Username – This is the admin username for the site. We highly recommend using something other than ‘admin‘ since using it can pose a security risk.
Password– A strong password will be automatically generated for you, but you can choose your own. The strength indicator will let you know how secure your password is.
Your Email– Login information will be sent to this email address, so make sure it is an email address you have access to.
Search Engine Visibility– If you want your website to show up in search engine results, leave this unchecked. If you do not want your site indexed, then you can check this box.
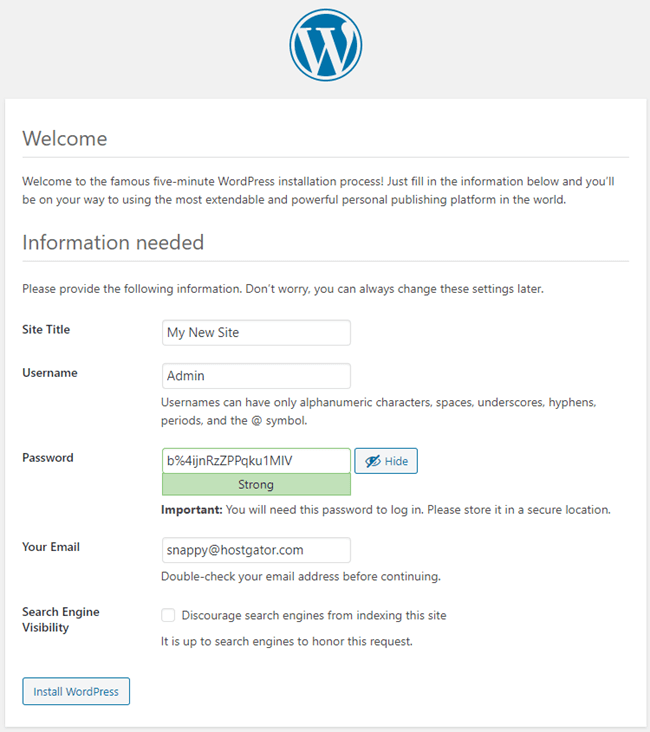
Click the Install WordPress button, and you should be taken to the final screen, which says, “WordPress has been installed. Thank you, and enjoy!“. It will display the username you chose on the previous page and a placeholder for your password. Click the Log In button to log in to the WordPress Admin Dashboard to begin building your site!
Final Step
Now you can access website and the WordPress admin panel.
Website: https://yourdomain.com/
Admin Panel: https://yourdomain.com/wp-admin
We’ll bring you more tutorials about WordPress in future. Stay Tuned.
